
To change the background of a photo, you need to separate the subject from what is behind it and put something new there. AI editors now do both in one step: you upload the photo, say what the new background should be, and the model redraws the scene around your subject. In SmileToAI's AI Image Generator, that happens in the image editor in one of two ways:
- Replace background (a preset, one click). The editor swaps the backdrop for a clean, realistic setting of its own choosing. You can't pick the scene.
- Prompt Edit (a sentence you write). You describe the exact scene, such as "a sunny seaside café terrace at golden hour", and list what must stay unchanged.
The short version, step by step:
- Upload your photo to the AI Image Generator and open it with Edit image (the pencil icon).
- For any clean new setting, open Presets and choose Replace background. For a scene of your choice, or a plain white or coloured backdrop, open Prompt Edit and describe it.
- Select Run 1 Edit and wait for the new version.
- Set the version you like as the cover and Download it.
Both routes keep your original photo and save the result as a new version. Both are AI edits paid in Sparks, SmileToAI's credits. A free account comes with 5,000 Sparks a month, and in our test Replace background used 185 of them and a Prompt Edit used 195. Each one came back in under a minute.
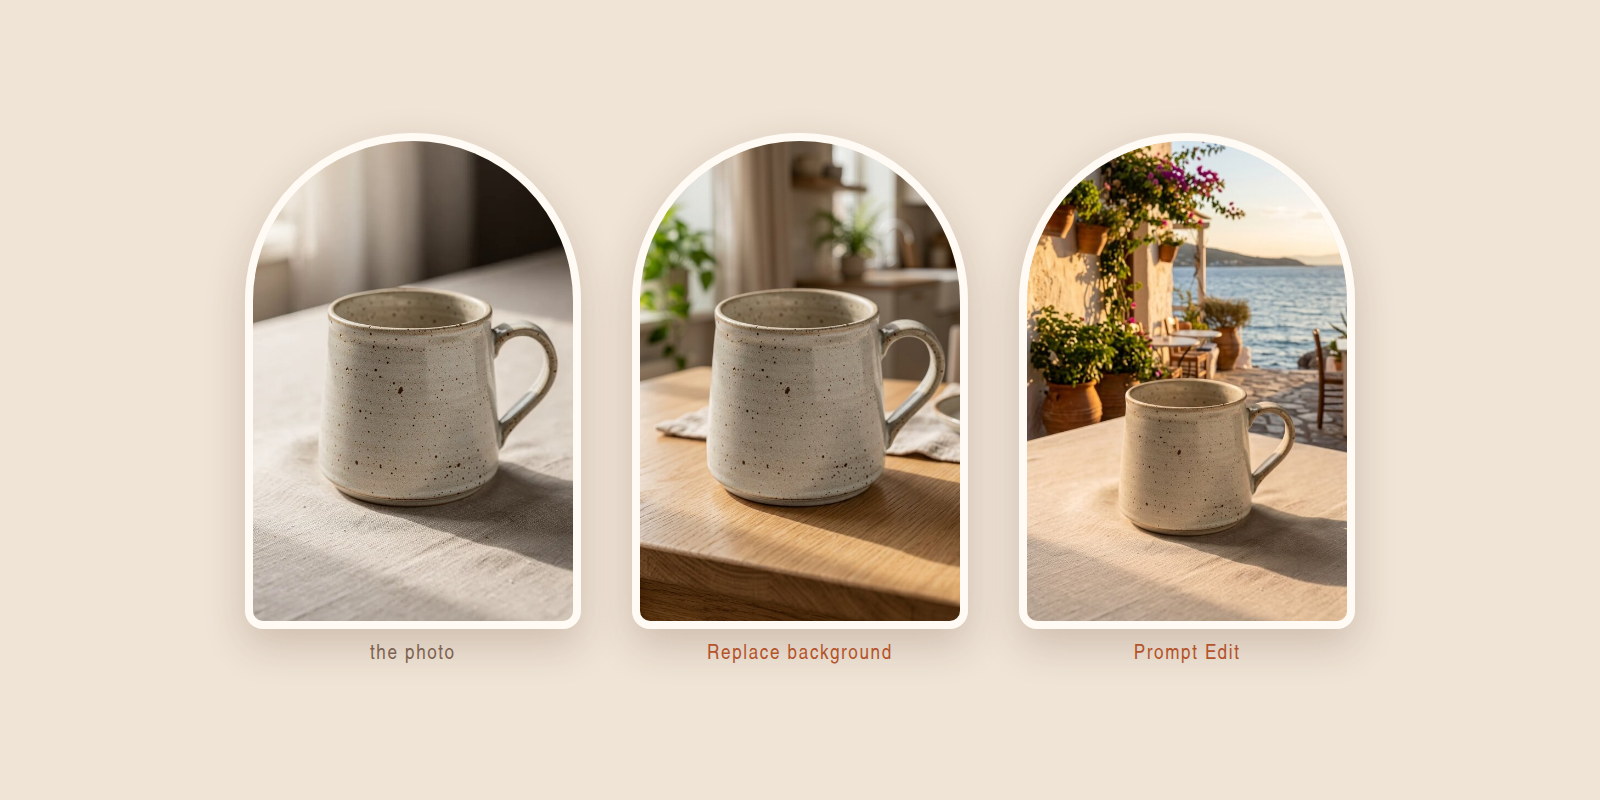
We ran both on the same product photo of a speckled ceramic mug. Here is the original next to the two results, exactly as they came back:
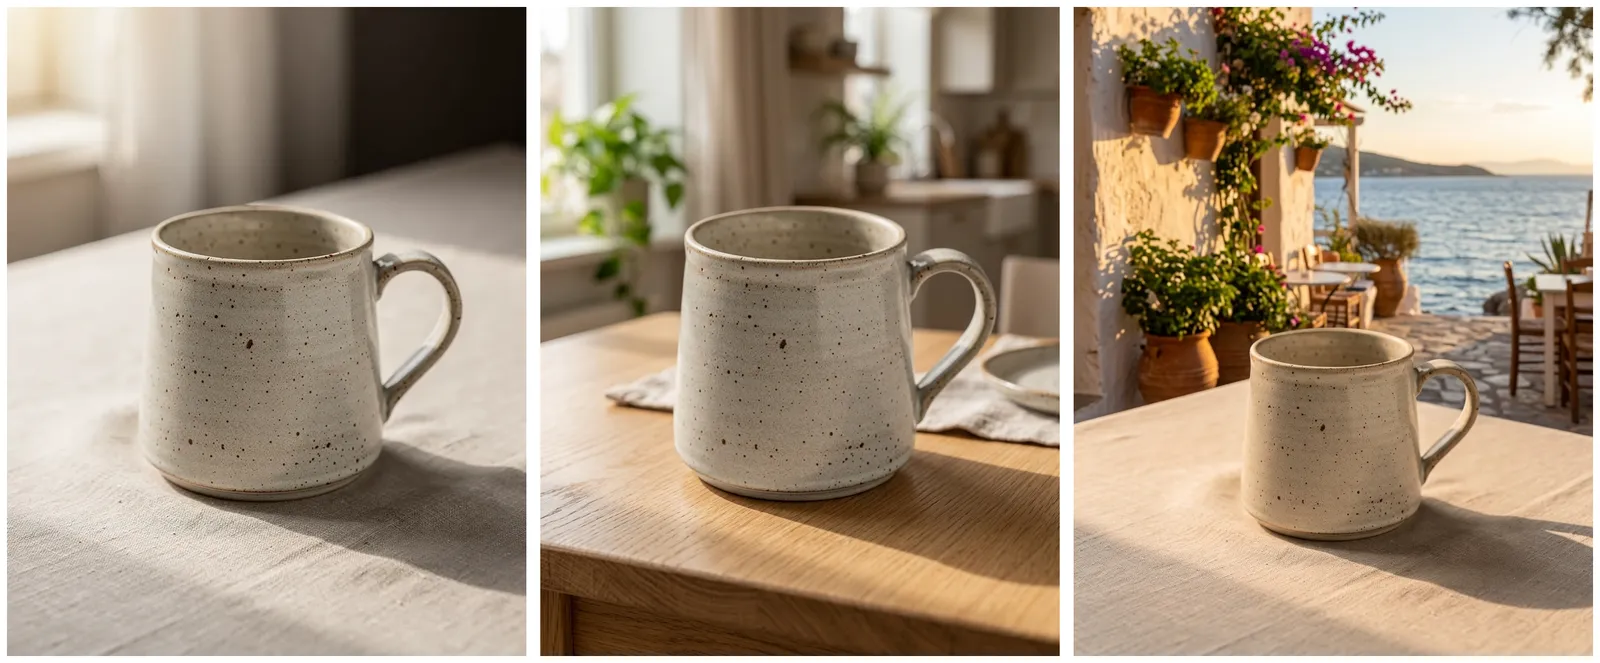
Left, the original photo. Middle, the Replace background preset (185 Sparks). Right, a Prompt Edit asking for a seaside café terrace (195 Sparks). No retouching and no second tries.
What you'll need
- A photo with a clear subject: a product, a pet, an object on a table. JPG, PNG and WebP all work.
- A SmileToAI account. The Free plan's 5,000 monthly Sparks cover many background changes at the cost we saw.
- A browser, or the SmileToAI app on iOS or Android, which has the same presets and Prompt Edit.
The photo in this guide is SmileToAI's own: a product shot of a handmade mug made with the AI Image Generator for our home page. It is 896×1120 pixels, a 4:5 portrait.
Step 1: Upload your photo and open the editor
- Open the AI Image Generator and start a session (New session in the sidebar).
- Open the generation settings (the sliders button in the composer) and choose All settings. Under References, select the plus button (Pick from library), then Upload images, and pick your photo.
- In the References list, select Add reference to gallery next to your photo. It now sits in the gallery as an image you can edit.
- Hover over the image in the gallery and select Edit image (the pencil icon).
The editor opens with the photo on the left, the Version Map on the right, and the editing tabs along the bottom: Crop/Reframe, Presets, Prompt Edit, Expand and Quality.
Step 2: Pick a route
| If you want... | Use | What you control |
|---|---|---|
| A tidier, neutral backdrop fast, and any clean setting will do | Replace background | Nothing beyond an optional mask. One click. |
| A particular place, mood or time of day | Prompt Edit | The whole scene, plus what must stay the same |
| A plain colour behind the subject | Prompt Edit ("a plain white background") | The colour and the light |
| No background at all (a transparent PNG) | A background remover | Nothing to describe; the subject is cut out |
If you only need the subject cut out to place on a slide, a website or a design of your own, skip the AI scene altogether: our guide on making a background transparent covers SmileToAI's background remover, which you can try without an account and which gives a free account the full-resolution transparent PNG.
Step 3a: Replace background with one preset
- Open the Presets tab.
- Select Replace background. It is marked Optional mask.
- Leave No mask selected to let the editor find the subject and the background on its own.
- Select Run 1 Edit. The arrow next to it sets how many variations to run: 1, 2, 4, 8 or 16.

The Presets tab with Replace background selected and no mask. The same grid holds Blur background, Relight and Background remove.
The preset asks the model for a clean, realistic setting while keeping the main subject and its edges. You don't choose the setting. Our mug came back on a light wooden table in a bright kitchen, with plants on the windowsill and a folded napkin and plate beside it. The mug's shape, speckles, handle and glaze match the original, and its shadow now falls across the wood as if the window light were real. The middle image at the top of this page is that result, unedited.
If the editor guesses the subject wrong, mark the background yourself. With Box or Brush under Mask tools, cover the area to replace, not the subject you want to keep. For Replace background, the mask marks the background. Then run the preset again; every attempt becomes a new version, and you can keep whichever one works.
Step 3b: Describe the scene with Prompt Edit
When "any clean setting" isn't enough, write the scene yourself.
- In the Version Map, select the version to edit. We picked the original again, so the second result is a fresh take rather than an edit of an edit.
- Open the Prompt Edit tab.
- In Edit prompt, say what the new background is and what must stay the same.
- Select Run 1 Edit.
This is the prompt we used, word for word:
Replace the background with a sunny seaside café terrace at golden hour, with a whitewashed wall, terracotta pots and the blue sea behind. Keep the mug exactly as it is: same shape, speckles, handle, glaze and size, and keep its shadow on the table.

The Prompt Edit tab with the scene written out. Improve prompt and Suggest edits can help when you are stuck for words.
The result has everything the prompt named: a whitewashed wall hung with terracotta pots and bougainvillea, café tables on a stone terrace, and the sea and hills behind in low golden light. The mug kept its speckles, handle and glaze. Two things differ from the preset's result. The mug is smaller in the frame, because the model pulled the camera back to show more of the terrace. The linen tablecloth from the original stayed, because the prompt asked only for a new background, not a new table. If the surface matters, say so in the prompt ("on a weathered wooden café table").
A few prompt habits that helped:
- Name what stays, not just what changes. Listing shape, speckles, handle, glaze, size and shadow kept the mug recognisably the same.
- Give the light a time of day. "Golden hour" set warm, low light on both the background and the mug.
- Ask for one scene, not a list of options. One clear place gets a clean result; several half-described ones get a muddle.
For more wording that works, including a background swap on a dog, see our tested AI photo editing prompts.
Step 4: Compare, set a cover and download
Every run is saved as a new version of the image, so the original is never overwritten. The Version Map shows the whole family: the original at the top, and each edit linked under the version it came from.
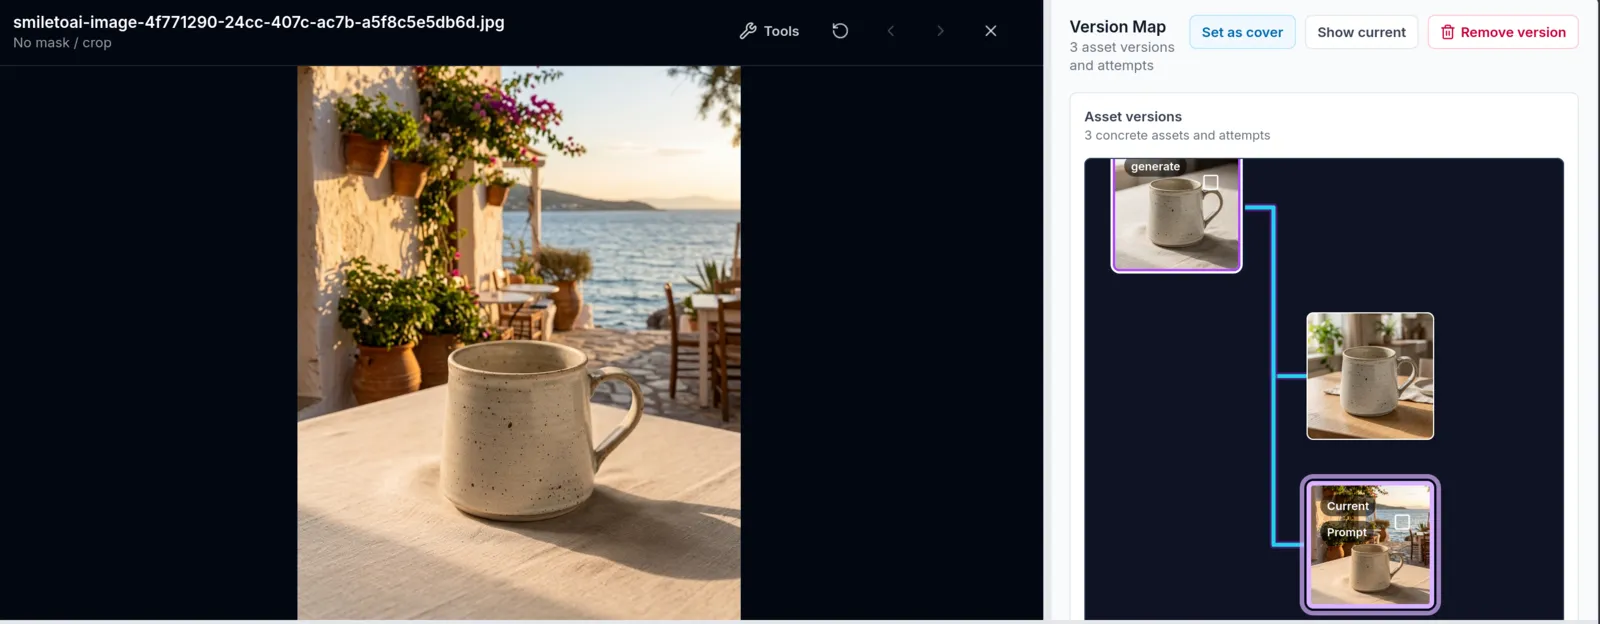
Three versions of one image in the Version Map: the original, the Replace background result and the Prompt Edit result, both edited from the original.
- Select a version in the Version Map. Compare to parent and Compare to root compare it with the image it came from or with the original.
- Select Set as cover on the version you want. The gallery then shows that version for the image.
- Close the editor and use Download on the image in the gallery.
Both results came back at 922×1152 pixels, the same 4:5 shape as the 896×1120 original. Then put the file where it is going: an online shop listing, a social post, a slide. Those steps only place the finished image; the background change itself all happened in the editor.
Common problems and fixes
The subject changed too. The model redraws the image, so small details can drift. Add what must not change to the prompt (shape, colour, logo, text, size), or mask the background so the edit is limited to it. Run two or four variations and keep the closest.
The new background doesn't match the light. Name the light in the prompt ("soft overcast daylight", "golden hour from the left") so the subject and scene are lit the same way.
The subject looks pasted on. Ask for a shadow: "keep its shadow on the table" did that in our test. The Add shadow preset adds a contact shadow under a masked subject if one is missing.
You need the exact background from a photo of your own. Both routes generate the new scene from a description. Prompt Edit can match a place closely if you describe it in detail; there is no step here for pasting in a background photo you already have.
You only want the background softer, not replaced. Use the Blur background preset in the same Presets tab. It keeps the scene and adds a shallow depth-of-field blur behind the subject; our guide on blurring the background of a photo tests it next to a stronger Prompt Edit blur.
Which route should you use?
Use Replace background when the photo just needs a cleaner, believable setting and you don't mind which one: it is one click and kept our mug the same size and in the same spot. Use Prompt Edit when the background has to be a particular place, colour or mood: you write the scene, and you get it, at a similar cost. Both sit in the same editor, both save a new version instead of overwriting your photo, and in our test each cost under 200 Sparks of the Free plan's 5,000 a month.
FAQ
How do I change the background of a photo without changing the subject?
Use an AI editor that keeps the subject and redraws only what is behind it. In SmileToAI, open the photo in the image editor and either run the Replace background preset or write a Prompt Edit that names the new scene and lists what must stay the same, such as the shape, colour and size of the subject and its shadow. Each result is saved as a new version, so the original stays as it was.
Can I choose what the new background is?
Yes, with Prompt Edit. The Replace background preset always asks for a clean, realistic setting and does not let you pick the scene. To get a specific place, such as a seaside café terrace, describe it in Prompt Edit instead.
Is changing a photo's background free?
Edits in SmileToAI use Sparks, its credits, and the Free plan includes 5,000 Sparks a month. In our test on a Free account, one Replace background run used 185 Sparks and one Prompt Edit used 195.
Can I just remove the background instead?
Yes. If you want the subject on a transparent background, to place on a slide or a page yourself, use a background remover. SmileToAI's background remover works without an account at preview resolution; a free account gets the full-resolution transparent PNG.
Can I change a photo's background on my phone?
Yes. The SmileToAI app for iOS and Android has the same image editor presets, including Replace background, and the same Prompt Edit tool.