
To colorize a black-and-white photo with AI, digitize it, upload the file to an AI colorizer, and download the colored result. With SmileToAI's free photo restoration tool that takes three steps: choose the photo (PNG, JPG, GIF or WebP, up to 20 MB), compare the Original and Restored versions with the slider, and select Sign up free & download to save the full-resolution image. You don't need an account to see the result. A free account unlocks the full-resolution file.
The tool does more than add color. The same pass removes scratches, dust, creases and grain, sharpens soft detail, and keeps the original composition and faces intact. That matters because most black-and-white photos worth colorizing are also old, and a clean, colorized print looks far more convincing than a colorized scratch.
This guide covers the whole job. It explains how to prepare a good digital copy, what the tool does on each run, how to judge the result, and what AI colorization can't know about your photo.
What AI colorization actually does
A black-and-white photograph records how bright each point was, not what color it was. A red scarf and a green scarf of the same brightness look identical in grayscale. So no tool can recover the "true" colors of a monochrome photo. What an AI colorizer does is predict them.
Colorization models learn from huge numbers of color photos what things usually look like: skin, sky, grass, brick, wool coats and wooden furniture. Given your grayscale image, the model recognizes those objects and assigns colors that fit their shapes, textures and brightness. SmileToAI asks for natural, historically plausible color, which steers the result toward period-appropriate tones rather than saturated, modern-looking ones.
Two practical consequences follow:
- Common subjects colorize best. Faces, foliage, sky, water and everyday clothing have strong visual cues, so they tend to come out most natural.
- Specific colors are a guess. A uniform's exact shade, the paint on a family car, or a patterned dress may come out plausible but wrong. If you know the real color, keep that in mind when you share the image.
What you'll need
- The photo in digital form. A scan of the print is ideal. A well-lit phone photo of the print also works.
- A file the tool accepts: PNG, JPG, GIF or WebP, up to 20 MB.
- A web browser. The restore tool is a web page, so there is nothing to install. Open /tools/restore-old-photo.
- A free SmileToAI account, only when you're ready to download the full-resolution result.
Step 1: Make the best digital copy you can
The AI can only work with what it sees, so the quality of your input sets the ceiling on the result. A little care here pays off more than anything you do later.
- Scan rather than photograph when you can. A flatbed scanner gives even light and no perspective distortion. Use the highest resolution your scanner offers for small prints.
- If you use a phone, avoid glare. Shoot in soft daylight, hold the phone parallel to the print, and turn off the flash. A reflection across a face is hard to repair.
- Remove the photo from glass or plastic sleeves if you can do so safely. Sleeves add glare and texture that the model may read as damage.
- Crop off the scanner bed and borders so the photo fills the frame. The tool keeps your composition, so whatever you upload is what you get back.
- Keep the file under 20 MB. A high-resolution scan saved as TIFF may be too large, so export it as JPG or PNG first.
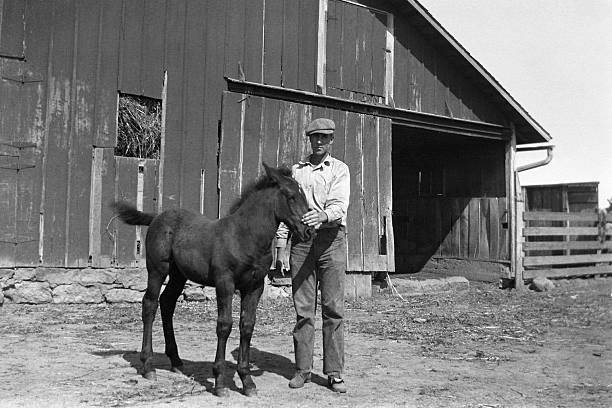
The example used in this guide: a black-and-white farm photo of a man, a foal and a barn, before colorization.
Step 2: Upload the photo to the restore tool
Open the SmileToAI photo restoration tool and select Choose a photo, or drag and drop the file onto the page. There are no settings to configure: each run produces one restored version that is repaired, sharpened and colorized in a single pass.
While the tool works, the page shows "Restoring your photo…". When it finishes, the result appears on the same page.
Step 3: Compare the original with the colorized version
The result opens in a before-and-after comparison labeled Original and Restored. Drag the handle across the image, or use the left and right arrow keys, to check the two versions against each other.
What to look at:
- Faces first. Check that features, expressions and skin tones look natural. The restoration is built to keep faces and identity, so the person should look like themselves, just in color.
- Large areas of flat color. Sky, walls and clothing show whether the color is even or blotchy.
- Edges between objects. Look where a sleeve meets a background or hair meets sky. Color bleeding across an edge is a typical sign of automatic colorization.
- Repaired damage. Scratches, dust spots and creases should be gone without smearing the detail around them.
If you are not signed in, the result is a downscaled preview so you can judge it before creating an account.
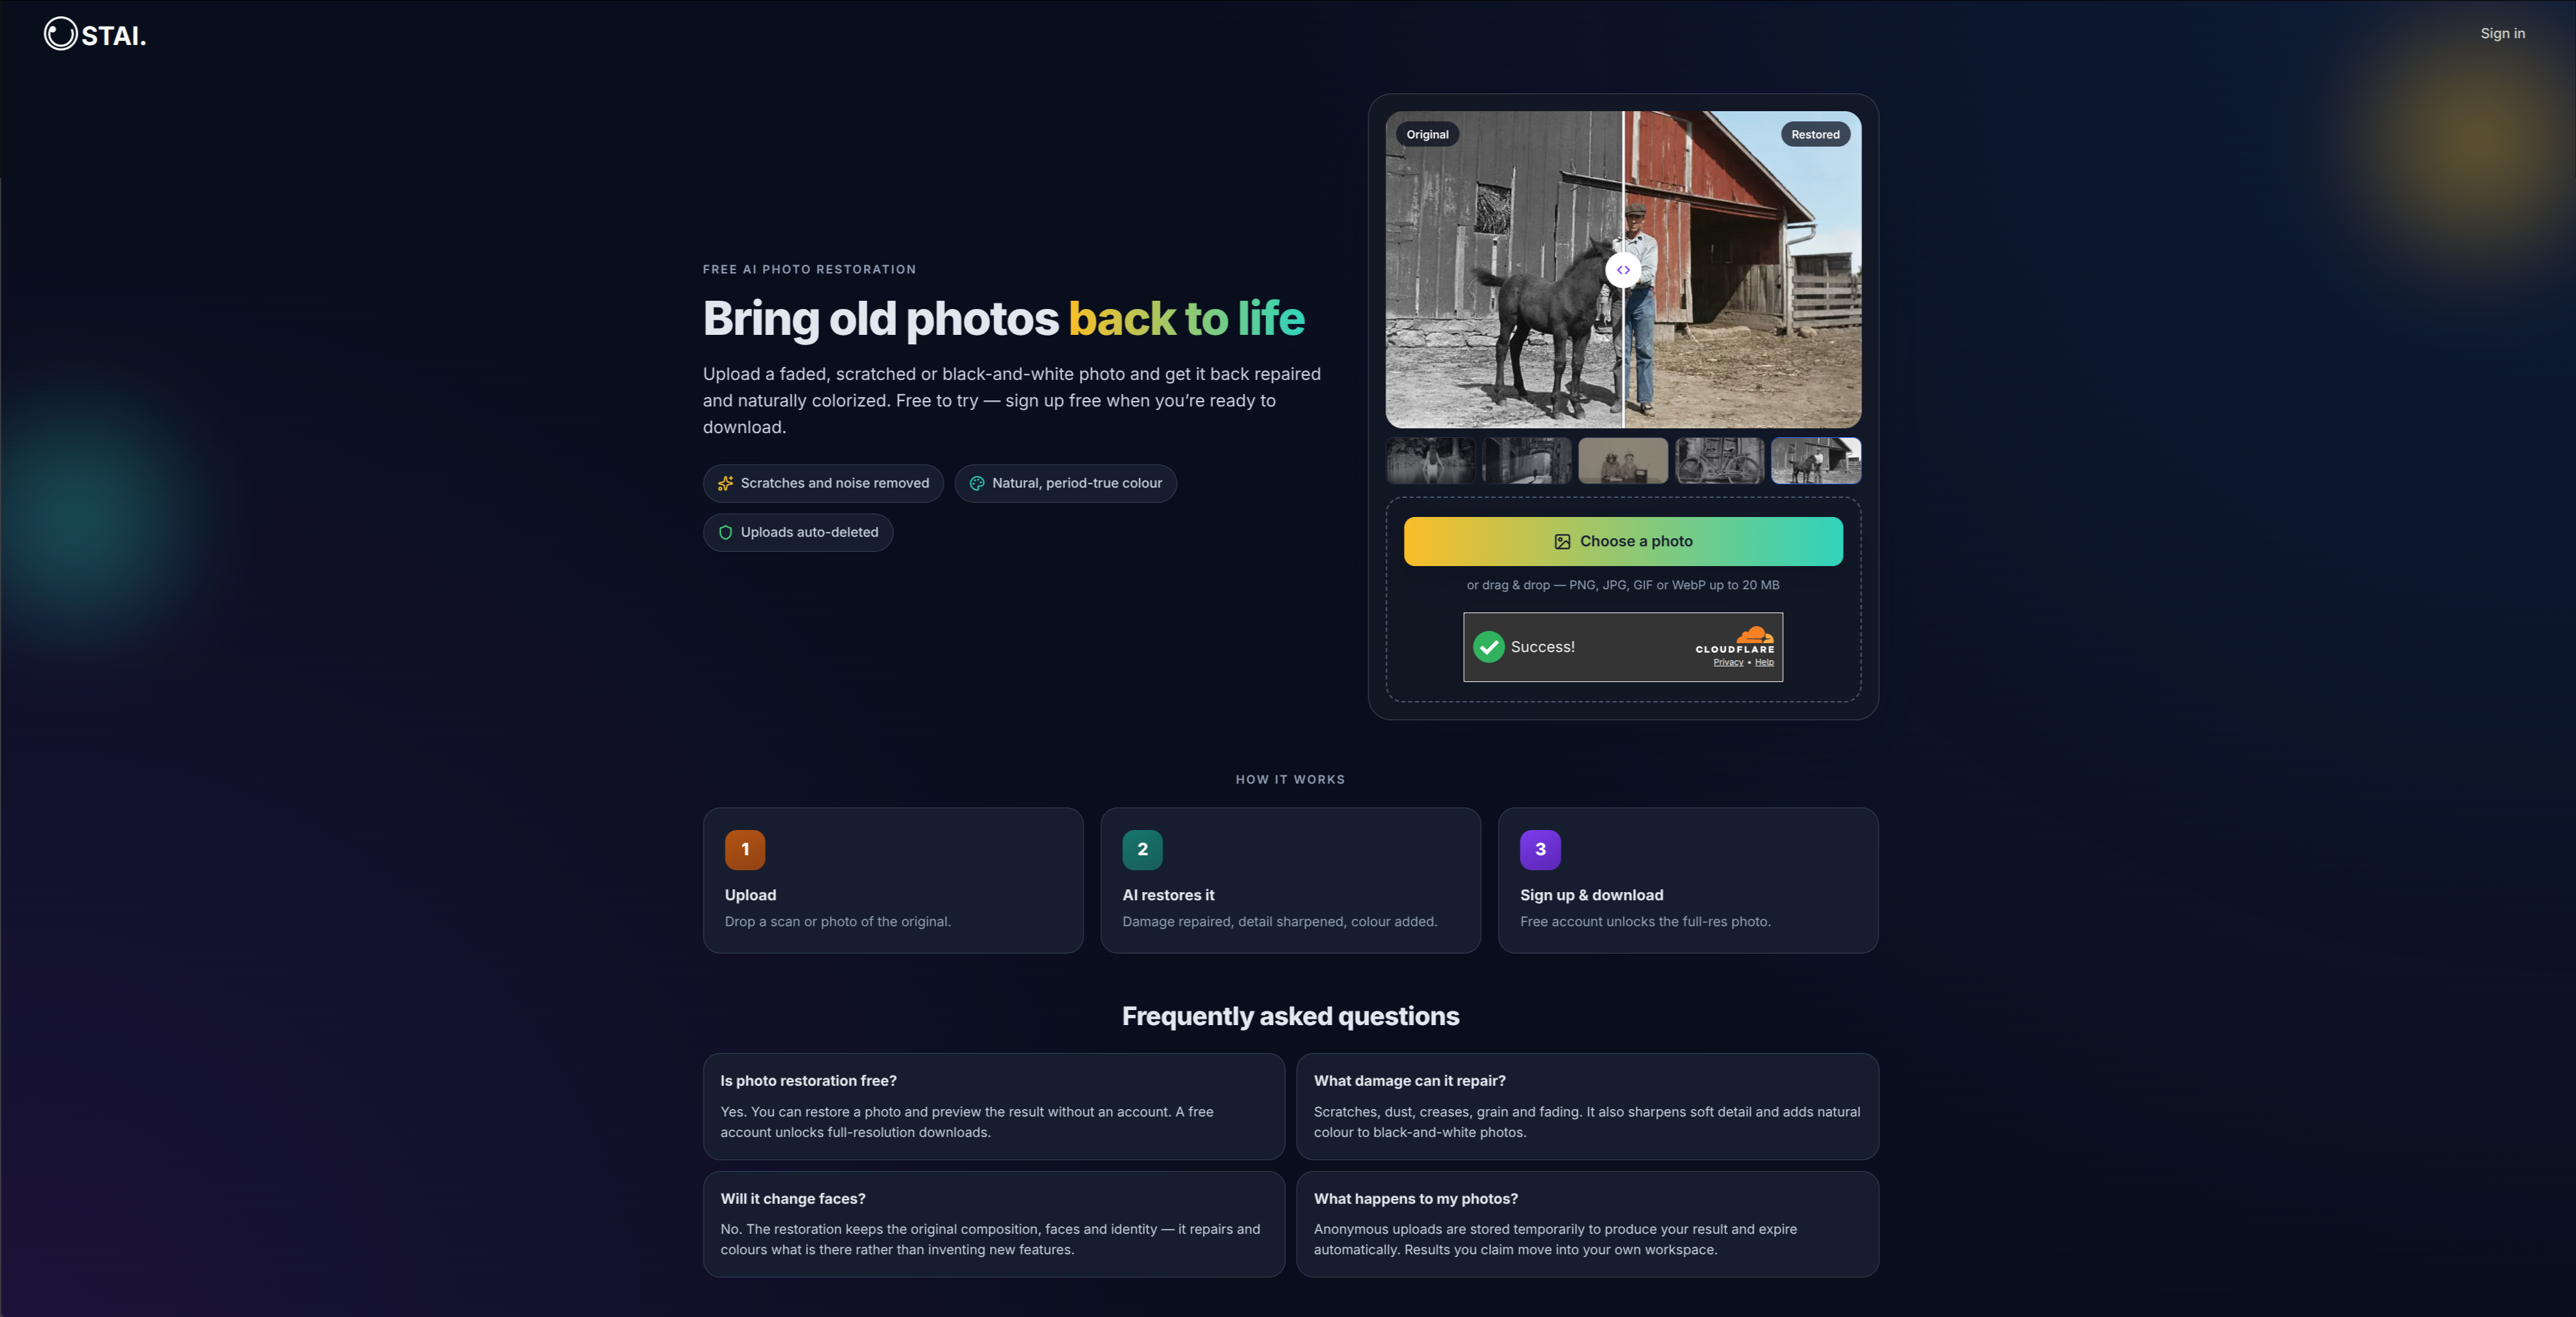
The same photo on the logged-out restore page, with the comparison handle dragged to the middle: Original on the left, Restored on the right.
Step 4: Download the full-resolution photo
When you're happy with the result, select Sign up free & download. A free account unlocks the full-resolution colorized photo, and your result waits on the page while you sign up. If you're already signed in, you'll see Download full resolution instead.
To colorize another picture, select Restore another photo.
Free use, accounts, and Sparks
- Without an account, you can run the tool and see a preview-resolution result. The number of free anonymous runs is capped per visitor and per day. When you reach it, the page tells you to sign up or come back tomorrow.
- With a free account, you can download the full-resolution result of your run.
- Signed-in runs use Sparks, the credits that power everything in SmileToAI. Paid plans run restorations at the High quality tier. See pricing for what each plan includes.
Tips for a better colorized photo
Start with the least-damaged copy. If a family has several prints of the same photo, scan the one with the best contrast. Repairing a tear is easier for the model than inventing detail lost to heavy fading.
Try another run on a stubborn photo. Each run returns a single version. If one attempt handles a face or background poorly, run the photo again and compare.
Label the result as colorized. When you share a colorized family or historical photo, say so in the caption or file name. Relatives and archives will want to know which version is the original.
Keep the original scan. Colorization is an interpretation. Archive the untouched scan next to the colorized version so you never lose the source.
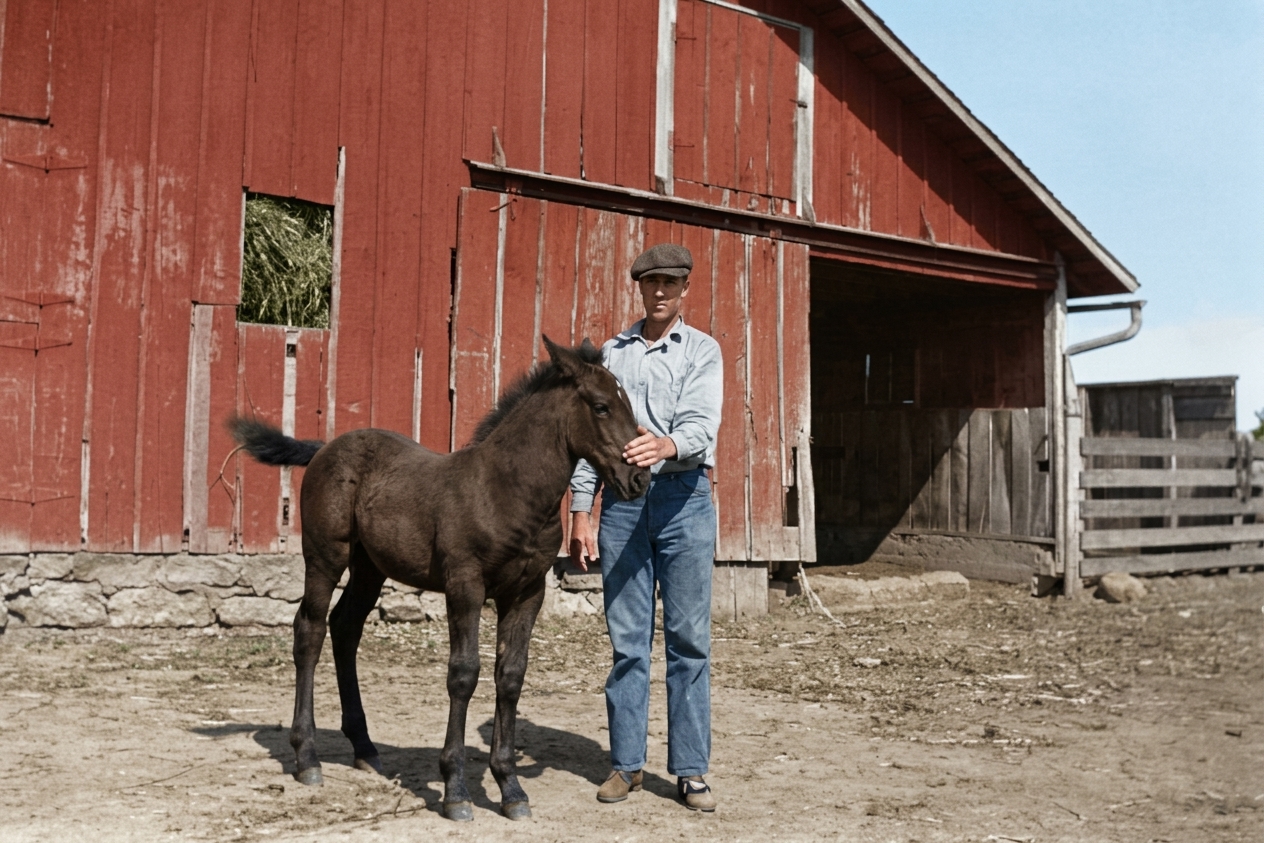
The farm photo after one run of the restore tool.
Here is what the model decided for the farm photo. Nothing in the original says what color anything was, so every color in the result is the model's choice. It painted the barn a weathered red, a classic barn color, and kept the grayscale wear on its boards, so the peeling paint and bare patches read as faded red paint. The man's shirt came out pale blue and his trousers denim blue, a believable look for work clothes. The foal's coat stayed a very dark brown, close to the tone it has in the original, and the hay in the loft window turned green-gold. Each of those is plausible, and any of them could still be wrong: a family who knew the barn was white or grey would see that at once. If you know the real colors in your own photo, compare them with the result before you share it.
What the tool doesn't do
It's worth knowing the limits before you start:
- One photo at a time. There is no batch upload, so colorize a family album one image at a time.
- One version per run. You don't get several color variations to pick from. Run the photo again for another take.
- Repair and color always come together. You can't ask for repair only and keep the photo black and white, or for color with no clean-up.
- No manual color picking. You can't tell it that a specific jacket was blue. The colors come from the model's reading of the image.
Is it private?
Anonymous uploads are stored temporarily to produce your result and expire automatically. When you sign up and claim a result, it moves into your own SmileToAI workspace, where you can keep working with it alongside everything else you create with the AI Image Generator.
The short version
- Scan or photograph the print cleanly and save it as PNG, JPG, GIF or WebP under 20 MB.
- Upload it at smiletoai.com/tools/restore-old-photo.
- Compare Original and Restored with the slider.
- Select Sign up free & download for the full-resolution colorized photo.
AI won't tell you what color your grandmother's coat really was, but it will give you a clean, natural-looking color version of a photo that has only ever existed in gray. For most family photos, that's exactly what people are looking for.
FAQ
Can I colorize a black and white photo for free?
Yes. The SmileToAI restore tool at /tools/restore-old-photo colorizes a photo without an account and shows you a preview-resolution result. Creating a free account unlocks the full-resolution download. Signed-in runs use Sparks from your account.
Will AI colorization change the faces in my photo?
It is designed not to. The restoration keeps the original composition, faces and identity. It repairs and colors what is already in the photo rather than inventing new features.
Are the colors historically accurate?
They are plausible, not documented. A black-and-white photo stores brightness, not hue, so the AI chooses natural, period-appropriate colors based on what the objects look like. If you know a dress was red or a car was green, treat the colorized version as an interpretation, not a record.
Can I only colorize, without repairing scratches?
No. Every run both repairs and colorizes: it removes scratches, dust, creases and noise, sharpens detail and adds color in one pass. If your photo is already clean, the repair step simply has little to fix.
What file types can I upload?
PNG, JPG, GIF or WebP files up to 20 MB, one photo at a time.